I accept no liability whatsoever from any action you may take based on the information provided here.
How I fixed the central locking on my Peugeot 306
My Peugeot 306 1997 developed an annoying habit that whenever the car was locked, the doors would immediately, spontaneously open again. I resorted to slamming the doors in turn believing a sensor in one of the doors was to blame. By searching the internet, I found a series of posts about this very problem on other Peugeot 306‘s. Clearly, this is a common problem.The given solution was to short circuit two connections on the central locking control box.
On further reading, the most common cause of the problem is a break in the door wiring loom feeding the door central locking actuator sensors. The break is most common on the wiring between the A-post and the driver‘s door.
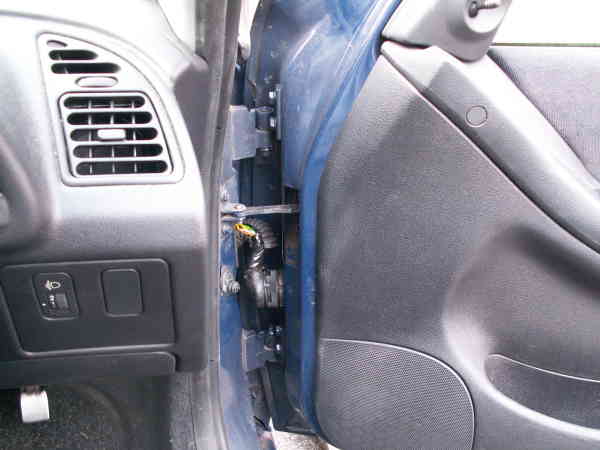
I found that by twisting the wiring loom connector on the door, I could repeatedly make the central locking work, then fail. The fact the electric windows are also intermittent also points to wiring in the loom on my drivers door becoming faulty / intermittent
I understand a new driver‘s door wiring loom is available from Peugeot under reference number 6542.vq. I understand the same part is available from Citroen, for the Xsara, at a lower price. (If you find the reference number, tell me so I can put it here)
Given I wanted the locking to operate close to normally until I can get a replacement wiring loom, I decided to try the short-circuit fix. I found the instructions didn‘t work for me, and fortunately, following them didn‘t cause any damage. It appears the wiring legends change over time on Peugeot 306 models. Less likely, bus still possible, it may also be the case that the pin-out to the central locking control box changes over time, so take care.
Locating the central locking control box
Lift the base of the driver‘s side rear seat to expose the control box. (Base of seat hinges forward)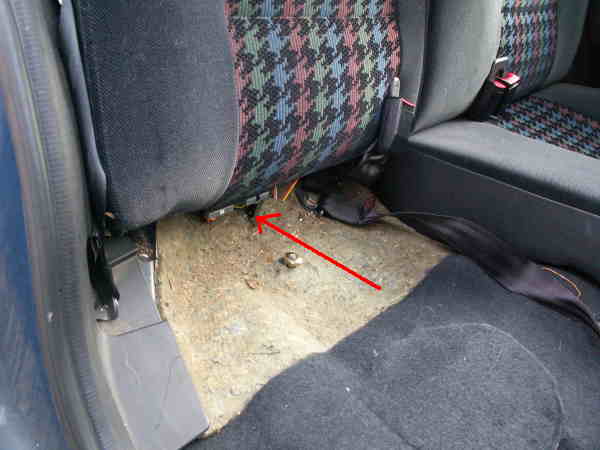
Unscrewing central locking control box
Fold driver‘s side rear seat down, then lift carpet to expose screws holding central locking control box in situ. Control box is held by three torx screws. (Screws already removed in picture)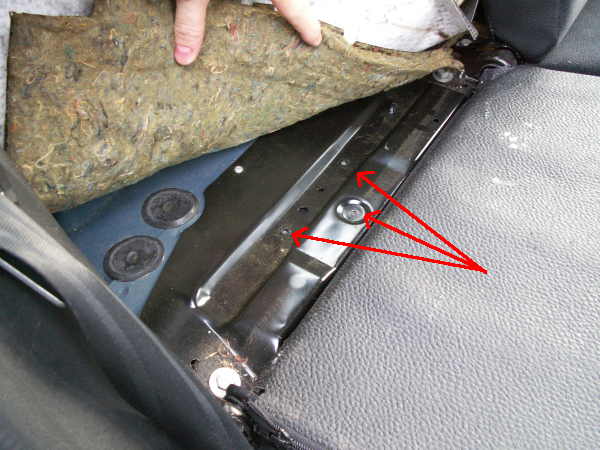
View of central locking control box
Once the screws are out, the control box comes away as shown. The plug we’re interested in is the black plug on the right in the picture.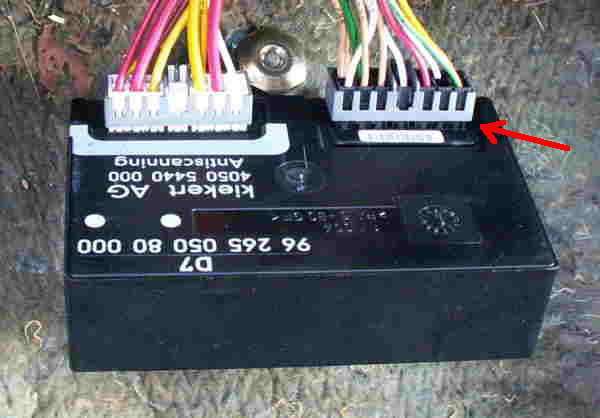
Pin designations
I will use the following pin designations. (They don’t necessarily follow anyone else’s pin designations for this plug, only for this article).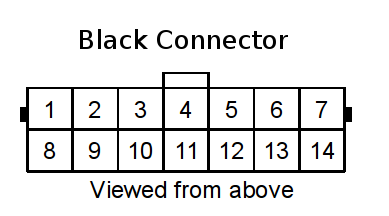
| Connections to front door sensors | |
| Pins | Function |
| 6 & 8 | Drivers door sensor |
| 6 & 12 | Passenger’s door sensor |
Control box modification
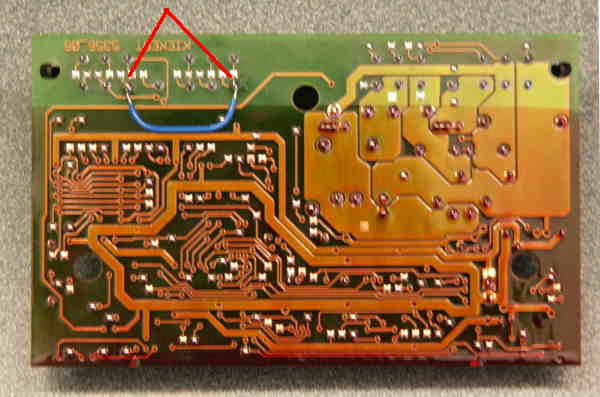
I modified the control box by soldering a jumper between pins 8 and 12 (as shown from the underside of the circuit board. See the blue jump wire soldered onto the pins, top left of the picture).
If this has been helpful, or if you notice any corrections, you can email me.